Zahran Marble
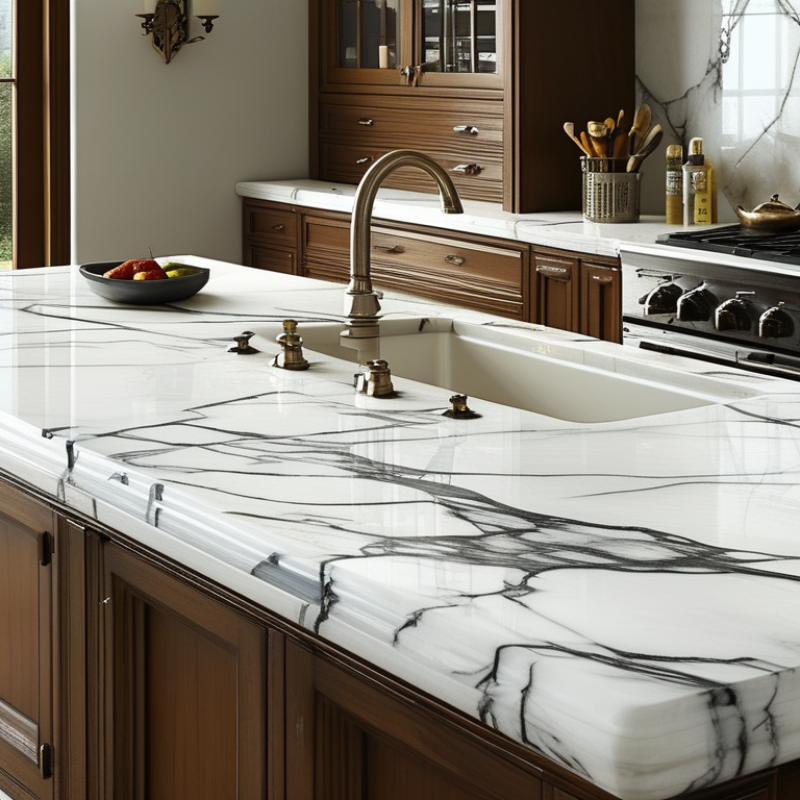
Marble vanity tops are a popular choice due to their elegance and durability. However, they are not invincible. A common issue homeowners face is chips on the edges. According to industry statistics, nearly 30% of homeowners reported experiencing this problem. Knowing how to repair a chipped edge on a marble vanity top can save both time and money.
Expert John Smith, a renowned marble restoration specialist, states, "Repairing a chipped marble edge is not just about aesthetics; it's about preserving the value of your home." This insight emphasizes the importance of addressing chips promptly. Ignoring a small chip can lead to larger cracks, compromising both beauty and functionality.
Repairing chips requires careful attention. Various methods exist, from DIY kits to professional services. Each option has its pros and cons, reflecting a balance of skill and materials available. While repairing a chip may seem straightforward, the techniques used can significantly affect the outcome. Balancing ease of repair with the desired finish makes the process both challenging and rewarding.
Chipped marble vanity tops often result from
everyday wear and tear. Heavy objects can fall or be dropped, creating unsightly chips. Additionally,
using harsh cleaning products can weaken
the marble’s surface over time. These issues may seem minor, but they can significantly diminish
the overall appearance of your vanity.
Water exposure is another common culprit.
Marble is porous, meaning it can absorb liquids. With time, this can lead to stains and chips.
Many homeowners overlook the sealing process.
Regularly applying a sealant can help protect
against water damage and wear. It’s crucial to understand that prevention
plays a significant role in preserving the beauty of your marble.
Repairing chips requires attention to detail. While DIY kits are available, knowing the right
approach is key. Mixing the epoxy correctly and matching colors can be challenging. Not everyone
achieves perfect results. Over time, these imperfections can be a constant reminder to reflect
on maintenance practices. Regular care can
greatly enhance the longevity of your marble vanity top.
Repairing a chipped marble vanity top is manageable with the right tools and materials. Start with a set of essential items: a marble repair kit, fine-grit sandpaper, and a soft cloth. An acrylic resin adhesive is crucial for bonding pieces back together. Make sure to have a putty knife for applying the adhesive. You may also need a spray bottle filled with water to keep surfaces damp.
It's important to carefully assess the chip's size and shape before starting. Prepare the area by cleaning it thoroughly. Use the sandpaper to smooth out the edges around the chip. This helps the adhesive bond well. Apply the resin with the putty knife, ensuring it's evenly spread. Avoid excessive application, as this could lead to uneven surfaces. Let it cure according to the instructions, but don’t rush—good repairs take time.
Remember, marble is a delicate material. Mistakes can happen, so be patient. Often, the repair may not be perfect, and that’s okay. Embrace the quirks and learn. Each chip has a story. With practice, you will become more skilled in handling marble repairs. Continuous effort leads to greater confidence in your abilities.
Repairing a chipped marble vanity top can be a straightforward process if done correctly. Start by gathering materials like epoxy resin, a mixing tool, and fine sandpaper. Clean the chipped area thoroughly with a mild cleaner and ensure it’s completely dry before proceeding. According to a report from the Marble Institute of America, nearly 60% of homeowners experience some type of wear and tear on their marble surfaces. This highlights the importance of knowing how to maintain and repair your vanity top.
Once your workspace is prepared, mix equal parts of the epoxy resin according to the manufacturer’s instructions. Use a small tool to carefully apply the mixture into the chip. Ensure it fills the void fully. After curing, use fine sandpaper to smooth the area, bringing it in line with the rest of the surface.
A survey conducted by HomeAdvisor indicates that 70% of homeowners prefer DIY repairs for minor damages, but not all feel confident in their skills. It's critical to take your time and focus on achieving a seamless finish.
After sanding, you may notice some imperfections. This is normal, especially for DIY repairs. Take a step back, assess your work, and see where you can improve. Continuous learning in home maintenance is important. Marble surfaces require special attention, and practicing this skill can save you money while enhancing your home’s aesthetic value.
Polishing and sealing a repaired marble vanity top is crucial for long-term durability. After applying the repair compound, wait for it to cure fully. This step ensures that the compound bonds well with the marble surface. Industry reports indicate that unsealed marble can absorb stains quickly. A sealed surface can reduce this risk significantly.
Use a high-quality polishing pad to buff the repaired area gently. This method helps restore the surface's sheen. It also smoothens out any rough patches left after the repair. A study by the Marble Institute of America shows that proper polishing can enhance the lifespan of granite and marble surfaces, making your vanity look brand new.
While sealing, choose a penetrating sealer to protect against moisture. Apply it with a soft cloth, following the manufacturer's guidelines. Remember to wipe off any excess sealer promptly. This practice ensures an even coat and prevents sticky residues. Take time to follow these steps carefully for the best outcome.
Tips: Always test a small area first. This approach can help gauge how well the sealer adheres to the marble. If unsure about the process, consult a professional. A little caution can save you from costly mistakes.
Chipped marble surfaces can be frustrating, but preventing future damage is essential. Proper care can help maintain the beauty of your marble vanity top. Start by cleaning with gentle pH-balanced cleaners to avoid etching. Harsh chemical agents can lead to more chips over time. Regularly dusting your marble with a soft cloth also prevents dirt buildup, which can cause abrasions.
Invest in coasters and mats for heavy objects. Placing these under items can reduce the risk of chips from unexpected impacts. It is easy to forget to use them during daily routines. However, the small effort can save significant repair costs later. Another preventive measure is sealing the surface regularly. Sealing keeps moisture and stains at bay, ultimately protecting your marble.
While it’s tempting to place hot items directly onto marble, avoid this practice. Heat can cause micro-cracks that might lead to serious damage. A simple wooden trivet can serve as an effective barrier. Overall, being mindful of daily habits around your marble surfaces will make a noticeable difference. A little caution can go a long way.
: Chips often result from heavy objects dropping, harsh cleaners, and water exposure. Regular use can lead to noticeable damage.
Sealing is crucial. It protects against water damage and stains. Regular application helps maintain the marble's appearance.
Yes, but it requires attention to detail. Mixing epoxy correctly and matching colors can be challenging for many.
Use gentle, pH-balanced cleaners. Harsh chemicals can etch the surface and potentially lead to more chips over time.
Use coasters and mats under heavy items. Regular dusting also helps prevent dirt buildup that can cause abrasions.
Avoid placing hot items directly on marble. Heat can create micro-cracks that lead to more significant damage over time.
After repairs, step back and evaluate your work. Imperfections are normal; reflect on how to improve for next time.
Many homeowners prefer DIY repairs, but not everyone feels confident. Take your time to ensure a good finish is achieved.
Imperfections can happen. It’s an opportunity to learn and improve your maintenance skills for the future.
Regular sealing is important. The frequency can depend on usage, but typically it should be done every 6-12 months.
Repairing a chipped marble vanity top can be a straightforward process if you understand the causes of such damage and have the right tools on hand. To begin, it's essential to identify what led to the chip, as this knowledge can help prevent future issues. The repair process involves cleaning the chipped area, applying an appropriate filler, and ensuring it sets correctly.
After fixing the chip, polishing and sealing the area will restore its original luster. Finally, taking preventive measures, such as using coasters and avoiding heavy impacts, can significantly decrease the likelihood of future chips. In summary, knowing how to repair a chipped edge on a marble vanity top not only enhances the appearance of your vanity but also extends its lifespan.