Zahran Marble Zahran Marble

China Best Marble Vanity Top Repair How to Fix Chips?

Time:2026-11-16 Author:Charlotte
0%

A chipped marble vanity edge can look small, yet it catches light and fingers every day. The right repair depends on the chip’s depth, the stone’s color, and its position near the sink. This guide explains How to repair a chipped edge on a marble vanity top with practical steps, realistic expectations, and advice on when professional help is safer. A tiny flake may suit a careful DIY repair. A deep break needs more judgment.

Stone-restoration specialist Fred Hueston is known for his work in stone care and restoration. A practical paraphrase of his professional guidance is: “Match the repair material to the stone, and prepare the surface carefully.” That principle matters. Dust, moisture, or a poor color match can leave a repair obvious under bathroom lighting. Use a stone-compatible filler or adhesive, follow its product instructions, and test the color on a discreet spot when possible. Keep the work area dry. Work slowly.

The repair usually involves cleaning loose particles, rebuilding the missing edge, allowing the material to cure, then shaping and refining it. A glossy finish is not automatic. Marble varies in veining and tone, so even skilled work may leave a faint mark. That is worth admitting. If the chip reaches a seam, exposes a large area, or keeps shedding fragments, consult a marble-restoration professional. A quick fix can become a larger repair. This introduction sets up the steps, materials, safety checks, and common mistakes that help readers make a sound choice.
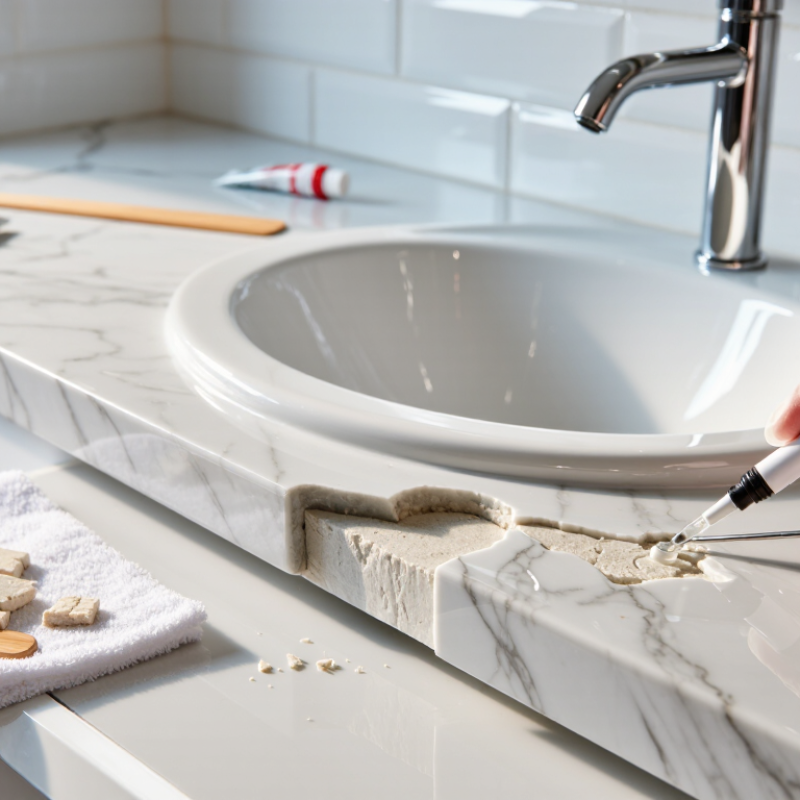
China Best Marble Vanity Top Repair How to Fix Chips?

Assess the Marble Chip and Choose the Right Repair Method

Assess the chip before choosing a repair. Wipe the area with a damp, pH-neutral cloth, then inspect it under side lighting. A shallow edge nick usually needs a color-matched stone epoxy; a deep crater or crack may need professional filling and reinforcement. Don’t mistake a dark vein for damage. Marble varies in composition, so a repair color that looks right when wet may dry too pale. Test the filler on a hidden spot.

Use evidence, not guesswork. ASTM C97/C97M measures natural stone’s water absorption and bulk specific gravity; ask your supplier for the slab’s test data, since marble has no single universal absorption value. The Natural Stone Institute’s stone-care guidance also recommends non-abrasive cleaning and suitable stone-safe products. These checks matter: moisture, dust, or household cleaner residue can weaken a patch. Tiny chips can be deceptive. For chips near a sink cutout, faucet hole, or unsupported edge, have a stone professional assess the surrounding stone before filling. I would not simply dab in clear glue; it can leave a glossy spot that catches the light. If the chip is small and stable, clean it, let it dry fully, and use a marble-compatible filler matched to the stone’s color and veining. Dry-fit your expectations, too. A hand repair may remain faintly visible.

Assessing a Marble Chip: Mohs Hardness Reference

Typical Mohs hardness ranges for marble and minerals commonly found in or compared with stone surfaces.

Marble is relatively soft and its hardness varies with mineral composition. For a small, shallow chip, a color-matched stone repair filler may be suitable; a deep chip, a crack, or damage near the faucet is better assessed by a stone repair professional. Hardness is a reference, not a way to measure chip depth.

Gather the Tools and Materials for Marble Chip Repair

Before repairing a marble vanity top, inspect the chip under bright light. Note its depth and check for cracks extending beyond the damaged spot. Clean the area with a soft cloth and a pH-neutral stone cleaner. Let it dry completely. Small chips only.

Gather nitrile gloves, eye protection, painter’s tape, and a plastic spreader. You’ll also need a marble-compatible repair filler or epoxy, plus stone-safe tint if the repair material needs color adjustment. Choose a product intended for natural stone, and follow its directions for mixing and curing. Keep fine-grit wet-and-dry abrasive pads nearby for gentle leveling after the filler hardens. Avoid metal tools that could scratch the surrounding surface.

Mask the area around the chip to limit mess, and test the tint on a disposable surface before applying it. Color matching is easy to underestimate; bathroom lighting can make a well-matched repair look slightly different. That can be frustrating. Use small amounts of tint, since adding more is easier than correcting an overly dark mix. If the chip is deep, the edge is loose, or a crack crosses the top, pause and seek advice from a stone repair professional. DIY filler may not hold securely in those cases.

China Best Marble Vanity Top Repair How to Fix Chips? - Gather the Tools and Materials for Marble Chip Repair
Tool or Material Recommended Specification Purpose Practical Notes
Protective equipment Safety glasses, nitrile gloves, and a well-ventilated work area Helps protect eyes and skin during cleaning, filling, and sanding. Follow the safety instructions on the repair product. Avoid breathing sanding dust.
Mild, pH-neutral stone cleaner Cleaner suitable for natural marble Removes ordinary dirt and residue before the repair. Avoid acidic cleaners such as vinegar or lemon-based products, which can etch marble.
Lint-free cloths Clean, soft cloths Used to clean and dry the damaged area. The surface should be fully dry before applying filler or adhesive.
Masking tape Low-tack tape suitable for delicate surfaces Protects the surrounding stone and helps keep the repair area neat. Place tape around, not over, the chip. Remove it before the filler fully hardens if the product instructions advise.
Two-part stone epoxy or marble repair filler Clear or stone-compatible product intended for stone repair Fills small chips and bonds loose fragments when the product is suitable for the stone. Check the product instructions for mixing ratio, working time, cure time, and suitability for vanity tops.
Stone colorant or tint Colorant compatible with the selected filler Helps the cured repair blend with the marble’s base color. Marble veining varies; test the color on a disposable surface before filling the chip.
Small mixing tools Disposable mixing surface and small plastic applicator Mixes and places filler accurately in a small chip. Use clean tools and prepare only the amount that can be applied within the product’s working time.
Fine abrasive paper or pads Fine grits appropriate to the repair product, used progressively Levels cured filler with the surrounding surface. Use light pressure and avoid sanding a wide area; excessive abrasion can dull the polished finish.
Stone polishing compound Compound specified for marble, if needed May help refine the finish after leveling. Follow the compound directions and test in an inconspicuous area. Polishing results depend on the marble finish.
Stone sealer Penetrating sealer labeled for natural marble, if the surface requires sealing Can help reduce absorption of liquids on suitable marble surfaces. Sealer does not repair chips or prevent etching. Apply only after the repair has fully cured and the surface is clean.
Professional stone repair service Consider for large, deep, unstable, or edge-spanning damage Provides specialist assessment and repair for damage beyond a small surface chip. If the stone is cracked, loose, or damaged near a sink cutout, avoid stressing the area and seek professional advice.

Clean and Prepare the Damaged Vanity Top

Before repairing a marble vanity chip, clear away soap, cosmetics, and loose grit. Use a soft cloth with a pH-neutral stone cleaner, then wipe with clean water and dry fully. Avoid vinegar, lemon juice, and abrasive pads; acids can etch calcite-rich marble, while grit may scratch the polished surface. The Natural Stone Institute’s Dimension Stone Design Manual recommends stone-appropriate maintenance rather than harsh household cleaners. Small details matter. Check the chipped edge under a bright light, and photograph it before cleaning if you need to compare the damage later.

Let the area dry before applying any repair material. ASTM C97/C97M measures dimension-stone water absorption as a percentage of mass, showing why moisture behavior is a material property, not something to guess from appearance. The test does not provide one absorption value for every marble variety, so follow the stone supplier’s care guidance when available. Mask nearby seams and fixtures with low-tack tape. Remove only loose fragments; do not widen the chip just to make it look regular. I would pause here rather than rush—the surface can look dry while the chip’s recess still holds moisture. A clean, dry, stable edge gives the repair compound a better chance to bond.

Fill the Chip with a Color-Matched Marble Repair Compound

A small chip on a marble vanity top can catch the light and draw attention, even when the rest of the surface is intact. Clean the damaged spot with a soft cloth and mild cleaner, then let it dry completely. Dry it fully. Check the marble’s base color and nearby veins before choosing a repair compound; a sample viewed in daylight may look different under bathroom lighting.

Use a compound made for marble, and tint it gradually to match the stone’s background rather than its darkest vein. Mix a small amount at a time. Press it into the chip with a plastic putty knife, working from the edges inward to limit air pockets. Leave the fill slightly higher than the surface, since it can be leveled after curing. Follow the product’s stated mixing and curing times; rushing this step can leave a soft or uneven patch.

Once cured, carefully level the repair with the method recommended for that compound, then wipe away residue with a clean, damp cloth. Avoid aggressive sanding, which may dull the surrounding polish. A close color match helps, but natural veining is difficult to reproduce exactly.

The repair may remain faintly visible, especially at an angle. That is frustrating, but a neat, stable fill is often more realistic than a perfect disguise.

Cure, Level, and Polish the Repaired Area

Once the chip is filled with a compatible stone-repair resin, let it cure fully before leveling. Cure time depends on the product, room temperature, and repair depth, so follow its technical data sheet rather than guessing. Keep the area dry and free of dust. A warm room may speed curing, but direct heat can create uneven results. Not a shortcut.

When the filler feels firm, use a sharp razor held nearly flat to shave it level with the marble. Work slowly; a blade tilted too steeply can scratch the surface or pull out soft filler. The Natural Stone Institute’s Dimension Stone Design Manual treats repair and finishing as material-specific work, while ASTM C97/C97M measures stone water absorption as a percentage of dry mass. That measurement matters: marble varieties differ, so don’t assume a filler will polish exactly like the surrounding stone. Test your abrasives on a hidden spot first.

Polish with progressively finer wet abrasives, using light pressure and keeping the pad moving. Wipe away slurry between stages, then inspect under side lighting; a dull halo often signals uneven finishing. Let the area dry before judging the color. I’d avoid chasing a perfect shine in one pass. It’s easy to overwork the edges.

FAQS

What should I check before repairing a marble vanity chip?

Inspect it under bright light. Look for deep damage, loose edges, or cracks extending beyond the chip. Small chips only.

What supplies do I need for a small chip repair?

Gather gloves, eye protection, painter’s tape, a plastic spreader, marble-compatible filler, and fine-grit wet-and-dry pads. Use stone-safe tint if needed.

How should I clean the damaged area?

Wipe away soap, cosmetics, and grit with a soft cloth and pH-neutral stone cleaner. Rinse with clean water, then dry fully.

Which cleaners should I avoid on marble?

Avoid vinegar, lemon juice, and abrasive pads. Acids can etch marble, while grit may scratch its polished surface.

How can I get a closer color match?

Compare the stone’s base color and nearby veins. Test tint on a disposable surface, adding only a little at a time. Bathroom light may change how the repair looks.

How do I apply the repair compound?

Mix a small amount according to its directions. Press it into the chip with a plastic tool, working from the edges inward. Leave it slightly raised.

How long should the compound cure?

Follow the product’s stated curing time. Rushing can leave a soft or uneven patch. It is tempting to hurry, but waiting matters.

How should I level the repair after curing?

Use the method recommended for the compound, then wipe away residue with a clean, damp cloth. Avoid aggressive sanding, which may dull nearby polish.

When should I contact a stone repair professional?

Pause if the chip is deep, its edge is loose, or a crack crosses the top. DIY filler may not hold securely.

Conclusion

Repairing a chipped marble vanity top begins with assessing the chip’s size, depth, and location to determine the most suitable repair method. Small chips can often be filled, while larger or more complex damage may require additional care. Gather the necessary supplies, including a marble-safe cleaner, protective gloves, a color-matched repair compound, and tools for smoothing and polishing. Before starting, clean the damaged area thoroughly and allow it to dry so dust, residue, and moisture do not interfere with the repair.

To learn How to repair a chipped edge on a marble vanity top, apply the repair compound carefully, filling the chip without spreading excess material over the surrounding stone. Follow the product’s curing directions, then level the hardened filler with care until it is flush with the marble. Finish by polishing the repaired spot gently to blend its appearance with the vanity top. A patient, clean process can help restore the surface and reduce the visibility of the damage.

Charlotte

Charlotte

Charlotte is a seasoned marketing professional with a deep understanding of the company's portfolio and a passion for elevating its presence in the market. With a keen eye for detail and a commitment to excellence, she ensures that our professional blog is regularly updated with insightful articles......