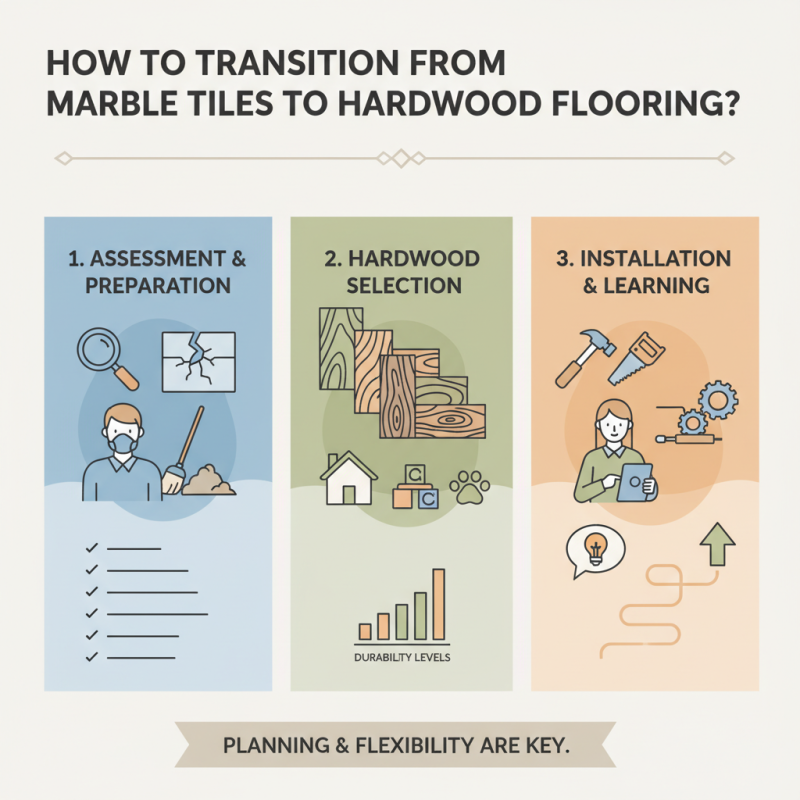
Transitioning from marble tiles to hardwood flooring can be a rewarding yet challenging project. Many homeowners desire the warmth and beauty that hardwood offers. However, they may feel uncertain about how to transition marble tiles to hardwood flooring effectively. This process requires careful planning and consideration.
When you begin, assess the current condition of your marble tiles. Is the surface uneven? Are there existing cracks? These factors can influence your approach. Removing marble can also create dust and mess, which is often underestimated. Some homeowners regret not preparing better for this aspect.
Selecting the right hardwood is crucial. Consider the style of your home and your lifestyle. Do you have children or pets? Different types of hardwood have unique durability levels. The installation process can vary, too. Whether you choose to DIY or hire professionals, understanding the nuances of this transition is essential. It’s important to learn from others’ experiences and be open to adjusting your approach as challenges arise.
Understanding the Differences Between Marble Tiles and Hardwood Flooring
Transitioning from marble tiles to hardwood flooring involves understanding their key differences. Marble is a natural stone, known for its luxurious look and cool feel. It is durable, but can be slippery and cold underfoot. Its maintenance can be challenging, as it requires sealing and regular cleaning to prevent damage from acids and stains. According to the Natural Stone Institute, marble’s porosity makes it vulnerable, which can pose issues in high-traffic areas.
Hardwood flooring, on the other hand, offers warmth and a wide variety of styles. It absorbs sound better than marble and feels more comfortable. The National Wood Flooring Association reports that hardwood can last up to 100 years with proper care. However, it is sensitive to moisture and may scratch or dent more easily than marble. Homeowners often face a dilemma when weighing aesthetics against practicality.
An essential point for reflection lies in the varying installation processes. Marble tiles require professional installation due to their weight and fragility. Conversely, hardwood can often be a DIY project, despite the necessity of proper acclimatization. The decision ultimately hinges on personal preference, lifestyle, and the specific environment in which the flooring will be installed. The choice is not merely aesthetic; it also reflects lifestyle choices and long-term maintenance commitment.
Evaluating the Cost Implications of Transitioning to Hardwood
Transitioning from marble tiles to hardwood flooring can be a significant investment. To evaluate the cost implications, consider material and labor expenses closely. Wooden floors may have a higher upfront cost compared to marble. However, hardwood often adds value to your home and can be more cost-effective over time.
Tips: Always get multiple quotations from contractors. This helps you find a fair price and understand the market better. Research the long-term benefits of hardwood, as it often requires less maintenance than marble.
Additionally, don’t forget to factor in the cost of any necessary underlayment. This can impact the overall price and durability of your new flooring. Check your existing flooring's condition. Sometimes, hidden issues could inflate costs unexpectedly. Engage with experienced professionals to guide you through potential pitfalls. Your budget should allow room for surprises, as hidden costs often arise during renovations.
Preparing Your Space: Tools and Materials Needed for the Transition
Transitioning from marble tiles to hardwood flooring can be a rewarding project that enhances your home’s aesthetic. However, preparation is crucial for a smooth installation. Understanding the tools and materials you’ll need is essential to tackle this task effectively.
For this transition, gather key tools: a pry bar, a hammer, a circular saw, and knee pads. These items ensure safe and efficient tile removal. You’ll also need underlayment, adhesive, and subfloor materials to support the new hardwood. According to industry reports, improper installation can lead to up to 30% of flooring failures. Therefore, investing time in preparation could prevent costly mistakes later.
Tip: Before removing your marble tiles, assess the existing subfloor condition. Inspect for moisture or damage to avoid issues with your new hardwood. Additionally, make sure to acclimate the hardwood planks in the installation area for at least 72 hours. This step helps prevent warping and buckling.
Ensure you have a solid plan for disposal of the old marble tiles. Eco-friendly disposal options are available, promoting sustainability in your renovation. Taking these steps not only aids in a seamless transition but also contributes to the longevity of your new flooring.
Step-by-Step Guide to Removing Marble Tiles Safely
Removing marble tiles can be a daunting task, but with proper planning and execution, it can be done safely. Begin by gathering your materials: a chisel, hammer, safety goggles, and knee pads. Protect your working area with tarps to catch any debris. This step is vital to avoid damaging other floors or furniture.
Start by assessing the condition of the tiles. Some may come off easily, while others may require more effort. Use a chisel to gently pry up the tiles from the edges. If a tile breaks, that’s okay—it can happen. Just ensure you're cautious about flying debris. Keep your eyes protected, and take breaks if you feel fatigued.
As you work, be aware that some tiles may be stuck due to adhesive. Sometimes the bond is stronger than expected. If this happens, dampening the adhesive with water can help loosen it. Don’t rush the process; patience is key. Reflect on your progress often. If you find it overwhelming, consider asking a friend for help. Their perspective could simplify decisions and ease the workload.
How to Transition from Marble Tiles to Hardwood Flooring? - Step-by-Step Guide to Removing Marble Tiles Safely
| Step |
Description |
Estimated Time (Hours) |
Required Tools |
| 1 |
Gather necessary tools and materials. |
1 |
Hammer, Chisel, Safety Goggles, Gloves |
| 2 |
Protect surrounding areas with drop cloths. |
0.5 |
Drop Cloths, Tape |
| 3 |
Score the tile surfaces with a utility knife. |
1 |
Utility Knife |
| 4 |
Remove marble tiles using a chisel and hammer. |
2 |
Chisel, Hammer |
| 5 |
Clean the subfloor to remove adhesive residue. |
1.5 |
Scraper, Vacuum |
| 6 |
Inspect the subfloor for damage and repair if necessary. |
2 |
Wood Filler, Sandpaper |
| 7 |
Install hardwood flooring according to manufacturer's instructions. |
3 |
Hardwood Panels, Nails, Flooring Gun |
| 8 |
Finish the flooring with appropriate sealants. |
2 |
Sealant, Roller |
Installing Hardwood Flooring: Techniques for a Professional Finish
Transitioning from marble tiles to hardwood flooring can enhance your space. However, achieving a professional finish requires careful planning and execution. Start by measuring your space accurately. This will help you estimate the amount of hardwood needed.
Prepare the subfloor before installation. Inspect it for any damages or uneven patches. Fixing these issues is crucial to avoid complications during the installation. A clean and dry surface ensures better adhesion. Lay down a moisture barrier if necessary, especially in basement areas.
When you start laying the hardwood, think about direction. Aligning the planks with the room's longest wall often creates a more spacious feel. Use spacers to maintain a uniform gap between the boards and the walls. It's common to encounter knots or imperfections in the wood. Don't overlook these; they can add character but be mindful of placement. Cutting the boards accurately also requires practice. Take your time, and don't rush through this critical step. A well-installed floor transforms any room dramatically.
FAQS
: Marble tiles are cool, durable, and luxurious but can be slippery. Hardwood flooring offers warmth and better sound absorption.
No, marble requires sealing and regular cleaning to avoid damage from acids and stains.
With proper care, hardwood flooring can last up to 100 years.
Yes, hardwood can be a DIY project, but it requires proper acclimatization.
You will need a pry bar, hammer, circular saw, knee pads, underlayment, and adhesive.
Assess the subfloor for moisture or damage to avoid future issues with hardwood.
Acclimate the hardwood planks in the installation area for at least 72 hours.
Align the planks with the room's longest wall for a more spacious feel.
Assess their placement carefully; they can add character to your floor.
It is crucial; a clean and dry surface ensures better adhesion and minimizes complications.
Conclusion
Transitioning from marble tiles to hardwood flooring requires careful planning and execution. First, it's essential to understand the differences between the two materials, as they offer distinct aesthetics and functionalities. Evaluating the cost implications associated with the transition will help you budget effectively. To prepare your space, ensure you have the necessary tools and materials on hand.
When considering how to transition marble tiles to hardwood flooring, follow a step-by-step guide that begins with safely removing the marble tiles. This involves using appropriate tools to minimize damage to the underlying surface. Once the tiles are removed, focus on proper installation techniques for the hardwood flooring to achieve a professional finish. By following these steps, you can ensure a successful transition that enhances the beauty and warmth of your home.