Zahran Marble
Marble brings cool veining and a firm, polished surface. Hardwood adds warmth, visible grain, and a little movement underfoot. Where they meet, the transition must handle both appearance and practical differences in height. A trim piece cannot fix an uneven subfloor. That detail is easy to miss.
How to transition marble tiles to hardwood flooring depends on the floor heights, tile edge, and wood installation requirements. Tile and stone consultant Donato Pompo is an established industry specialist. An editorial takeaway informed by his technical approach is: “Plan the transition around the floor assembly, not just the visible edge.” This is a paraphrase, not a verified direct quotation. It reflects a useful principle: inspect the substrate and follow the flooring manufacturers’ instructions before choosing a profile.
This guide explores seven options, including a flush joint, a metal T-molding, a reducer, a stone saddle, and a custom wood threshold. Some methods suit nearly level floors; others help manage a noticeable height change. The best-looking strip may still feel awkward if it creates a toe-catching lip. Small detail. Big effect. Measure carefully, check how the doorway opens, and consider expansion space where the hardwood requires it. These choices are not interchangeable, and a neat photo cannot confirm a safe, durable installation.
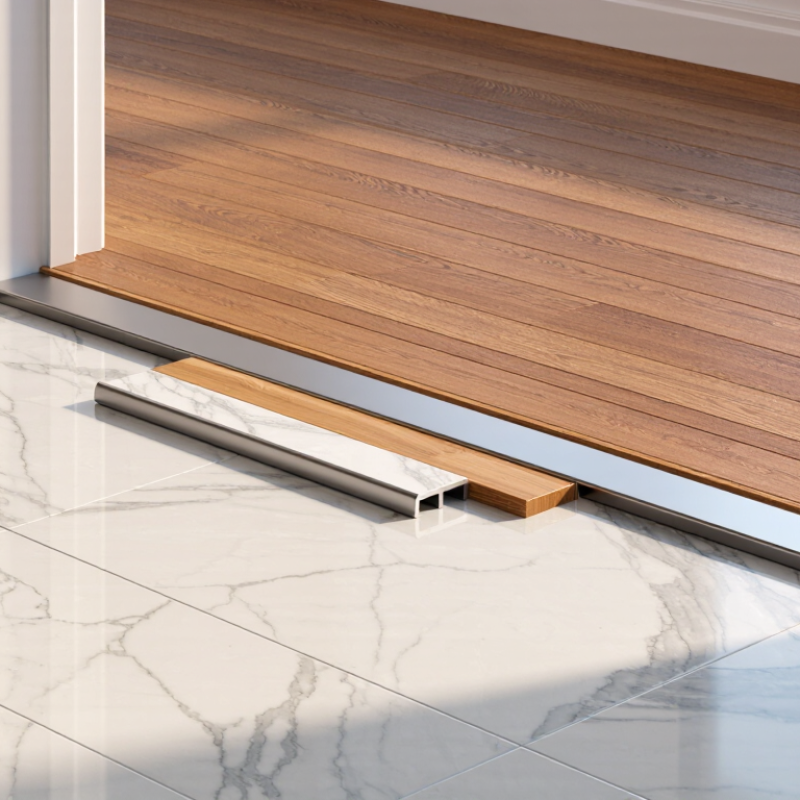
Before choosing a transition, measure both finished surfaces, not just the marble and hardwood pieces. Include mortar, underlayment, and any leveling layer. A straightedge across the doorway can reveal a height difference that is hard to see from above. Check the marble edge for chips or uneven cuts, and note whether the hardwood edge is square or tongue-and-groove. Small changes matter. A reducer may soften a height change, while a flush transition usually needs more precise edge alignment.
The subfloor must support both materials without movement or abrupt dips. Check flatness against the flooring and tile installation instructions; their requirements may differ. Also test wood moisture before installation. National Wood Flooring Association guidance limits the moisture-content difference between solid wood flooring and a wood subfloor to 4 percentage points for strip flooring under 3 inches wide, and 2 points for planks 3 inches or wider. Record readings in several spots, especially near exterior doors. Do not guess.
Tips: Dry-fit a short piece of hardwood beside the marble, then measure the actual height difference. Mark the transition line and inspect it from both sides. If the subfloor is uneven, correct it before covering it; a transition strip cannot reliably hide movement or a weak edge. I would recheck the measurements after leveling, too. That step is easy to skip.
The best transition depends on how the room is used, not just how the floors look together. In a quiet bedroom doorway, a narrow wood reducer can soften the height change between hardwood and marble. Match its tone to the floor, but check that its profile does not create a raised edge. A slim metal profile suits clean, modern rooms and takes less visual space. It can feel less warm beside natural stone, though.
In an entry or kitchen, expect wet shoes, grit, and frequent crossings. Choose a durable, firmly anchored profile with a low, smooth edge that is easy to sweep and less likely to catch a toe or rolling cart. Busy doorway? Keep it simple. If both surfaces sit at nearly the same height, a flush transition may work. Measure the finished floor heights, including underlayment, before choosing; even a small mismatch can change the right profile. Marble can chip, so avoid assuming it is safe to drill without checking the tile and installation. For a wide opening, a stone threshold may look intentional, but it can interrupt a continuous floor and add a height change. I would weigh that trade-off against the room’s traffic. Mock up the profile with painter’s tape first. The visual effect can surprise you.
| Transition Style | Best Fit | Traffic Suitability | Key Installation Considerations | Main Benefit |
|---|---|---|---|---|
| T-Molding | Marble and hardwood finished at nearly the same height, especially in a doorway. | Good for everyday residential traffic when securely installed. | Choose a profile sized for the measured joint. Leave the hardwood’s required expansion space beneath the molding, and fasten the track or molding without pinning a floating floor. | Creates a neat, low-profile cover for a relatively even floor joint. |
| Reducer Strip | A transition where the hardwood is higher than the marble and the height difference is modest. | Good for regular foot traffic; select a sturdy profile for busy passages. | Check the finished heights before choosing the reducer. The sloped edge should meet the lower surface smoothly, without an abrupt lip or unsupported edge. | Softens a small change in floor level and helps reduce a sharp edge. |
| Threshold or Saddle | Doorways and room openings where a broader, more defined transition is appropriate. | Suitable for frequent foot traffic when the threshold is firmly supported. | Measure the opening and floor heights carefully. Keep the piece stable, avoid placing fasteners into marble, and preserve the hardwood’s required movement gap. | Provides a substantial, clearly defined transition across an opening. |
| Overlap Reducer | A height difference where a surface-mounted profile is preferred over a flush joint. | Good for high-use residential areas when properly secured and free of loose edges. | Confirm that the profile covers the joint without obstructing doors. Install it according to its fastening method and do not restrict movement of a floating hardwood floor. | Covers the joint and can accommodate a gradual change between floor levels. |
| Flush Metal Transition Profile | A clean, contemporary look where the two finished surfaces are close in height. | Well suited to busy doorways when the profile is selected and installed for the expected use. | Choose a profile designed for the actual joint width and floor materials. Set it level with the finished floors, and keep installation hardware out of the marble tile. | Offers a slim, precise edge with a minimal visual profile. |
| Custom Marble-and-Wood Saddle | Distinctive openings, irregular joints, or projects that need a tailored transition piece. | Can suit heavy household use if the saddle is adequately supported and securely fitted. | Have the piece measured to the finished floor heights and opening. Account for hardwood movement, and use suitable support and attachment methods for both materials. | Can be made to fit unusual dimensions and coordinate with the room’s materials. |
| Wood End Cap or Threshold Profile | An exposed hardwood edge meeting marble where a finished, protective edge is needed. | Suitable for regular traffic; inspect periodically for looseness or wear. | Use a profile intended for the hardwood system and edge condition. Maintain the flooring manufacturer’s expansion clearance and avoid fastening through marble. | Finishes and protects the exposed hardwood edge at the transition. |
A flush marble-to-hardwood transition starts with accurate measurements, not a trim catalog. Check both finished surfaces at several points; marble beds and older subfloors can vary. ANSI A108.02 allows tile lippage of 1/32 inch, plus inherent tile warpage, when grout joints are under 1/4 inch. For wider joints, the allowance is 1/16 inch plus warpage. That detail matters: a T-molding may bridge a small gap between nearly level floors, but it cannot disguise a poorly prepared height change. Keep the hardwood’s required expansion space clear, too.
Choose the profile for the actual edge. A wood strip can be milled to meet the marble closely and suit the floor’s color, but seasonal movement may open a fine seam. A metal profile gives a slim, durable edge and can protect exposed tile; select one sized for the tile assembly, not just the visible tile. Dry-fit each piece. Check it from standing height and from a low angle. Small details show.
The National Wood Flooring Association’s installation guidance emphasizes evaluating job-site conditions and moisture before installation; a transition should not clamp a floating wood floor in place. That safeguard is easy to overlook when a neat, tight-looking joint is the goal. Use compatible fixing methods, keep the top surfaces nearly flush, and confirm the profile does not create a sharp toe-catching lip. A sample laid beside the actual marble is more reliable than a screen measurement.
Ratings are editorial comparisons of each method’s potential to create a flush-looking transition, not measured test results. The right option depends on the actual floor-height difference, joint requirements, and installation details.
A flush-looking junction starts with measurement, not trim selection. Check the tile and hardwood at several points, because mortar beds and subfloors can create uneven edges. The U.S. Access Board’s 2010 ADA Standards, Section 303, allow changes up to 1/4 inch vertically; changes from 1/4 to 1/2 inch require a bevel no steeper than 1:2 on accessible routes. These figures are useful design benchmarks, though local requirements may differ. Small details matter.
For a modest height change, a reducer slopes down from tile to wood and softens the step underfoot. An end cap gives exposed tile a clean, protected edge, but it may not bridge a large height gap. A saddle can span a doorway, especially where both floors need a defined boundary. Dry-fit each piece and check that doors clear it. A dry fit helps.
Custom borders can make a difficult transition look intentional. A narrow stone strip, for example, can frame the marble while easing into the hardwood. Keep grout joints aligned, avoid sharp lips, and leave room for wood movement. The National Wood Flooring Association’s Installation Guidelines stress proper site conditions and moisture checks before installation; a rigid, tightly trapped border can undermine that care. Measure again after fitting. Sometimes the neatest-looking profile is still too steep.
Before cutting either floor, check that the marble and hardwood are stable, clean, and close in height. A loose tile or raised wood edge can turn a neat transition into a trip hazard. Dry-fit the transition profile or carefully scribed wood strip, leaving room for the hardwood to move. Measure twice. The National Wood Flooring Association’s Installation Guidelines use moisture readings, not a fixed acclimation period, to guide installation. They cite a maximum moisture-content difference of 4 percentage points for strip flooring under 3 inches wide, and 2 points for wider plank flooring. Check the actual flooring and subfloor readings before fastening near the tile.
Set the transition so it bridges the materials without pinning the wood tightly against the marble. The Tile Council of North America’s Handbook, detail EJ171, addresses movement joints; its guidance supports leaving movement space where tile meets other restrained surfaces. Follow the flooring and setting-material instructions for the joint’s dimensions and fill. Avoid packing the gap with rigid grout. A flexible transition joint helps accommodate seasonal movement, though the exact detail depends on the floor assembly.
Use a fine-tooth blade for clean cuts, eye protection, and dust control. Keep fasteners out of tile edges and hidden services. One detail is easy to underestimate: a small height mismatch can catch socks and shoes. Recheck the joint with a straightedge, then walk across it from both directions. If the hardwood shifts or the profile rocks, revise the fit before finishing.
Consider room use, traffic, and floor height. A narrow wood reducer may suit a quiet bedroom. A slim metal profile takes less visual space.
Choose a durable, firmly anchored profile with a low, smooth edge. It is easier to sweep and less likely to catch shoes or carts. Keep it simple.
Yes, if both finished floors sit at nearly the same height. Measure with underlayment included. Even a small mismatch can change the right choice.
It can look intentional, but it may interrupt the continuous floor and add a raised edge. Weigh that against foot traffic. I’d test the look first.
Place painter’s tape along the planned profile. View it from both rooms. The visual effect can surprise you.
Leave room for hardwood movement, and avoid pinning it tightly against the marble. Follow the flooring and installation-material instructions for joint dimensions.
Avoid rigid grout in the movement gap. A flexible joint can accommodate seasonal movement, though the correct detail depends on the floor assembly.
Make sure the tile and hardwood are stable, clean, and close in height. Keep fasteners away from tile edges and hidden services. Measure twice.
Check the joint with a straightedge, then walk across it from both directions. If the profile rocks or the hardwood shifts, revise the fit.
How to transition marble tiles to hardwood flooring starts with carefully assessing both surfaces. Measure the height and condition of the marble and wood edges, check that the subfloor is stable, and note any unevenness that could affect the finished joint. The right transition depends on the room’s style, how much foot traffic it receives, and whether the two floors meet at the same level.
For a nearly flush joint, consider a T-molding, a narrow wood strip, or a metal profile. When one floor sits higher, a reducer, end cap, saddle, or custom border can create a smoother and more secure connection. Before installation, clean and prepare the edges, leave appropriate room for wood movement, and secure the chosen piece according to its material and placement. Finish with a neat, even seam, and check that the transition feels stable underfoot. Proper planning helps the two flooring materials meet cleanly while preserving a cohesive look.